Prep Time: 10 minutes of active work
Rise Time: 12-18 hours (overnight is perfect!)
Bake Time: 35-40 minutes
Total Time: Approximately 13-19 hours (mostly inactive)
Intensity: Low. This is a recipe for patience, not muscle. It’s perfect for a relaxing weekend or a busy weekday when you can let time do the work.
Yield: 1 medium-sized loaf
The Star Ingredients
The beauty of this recipe is its flexibility. Here is the basic blueprint, followed by the “simple seeded” variation.
The Core 3:
3 cups (360g) All-Purpose or Bread Flour: Bread flour will give you a chewier texture, but all-purpose works beautifully for a tender crumb.
1 ½ tsp (8g) Kosher or Sea Salt: Don’t skimp on the salt; it’s for flavor, not just seasoning. It controls the yeast activity and strengthens the gluten.
1 ½ cups (360ml) Lukewarm Water: Not hot, not cold. About body temperature (98°F / 37°C) is ideal.
The “Seeded” Twist:
½ cup (70g) Mixed Seeds: This is where you can customize. A classic mix might include:
2 tbsp Sesame Seeds (nutty)
2 tbsp Sunflower Seeds (earthy)
2 tbsp Poppy Seeds (subtle crunch)
Extra seeds (2 tbsp) for topping: A mix of rolled oats and sesame seeds works wonderfully for the crust.
A note on yeast: You might be thinking, “Wait, no yeast?” You are correct. This recipe uses a fermentation process that relies on a small amount of yeast. For this version, we will use a tiny amount of instant yeast to guarantee a good rise, but it remains a “simple” pantry recipe.
The Secret Ingredient (Optional but Recommended):
¼ tsp (1g) Instant Yeast: This is less than 1/8 of the packet. It provides a reliable lift without imparting any yeasty flavor. For a true sourdough-style fermentation, you can omit it, but the rise will take longer and be less predictable.
Step-by-Step Instructions
This recipe is broken down into three easy phases: Mix, Rise, and Bake.
Phase 1: The Mix (Intensity: Very Low – 10 minutes)
Combine Dry Ingredients: In a large mixing bowl, whisk together the flour, salt, instant yeast (if using), and your ½ cup of mixed seeds. Make sure everything is evenly distributed.
Add Water: Pour the lukewarm water into the bowl.
Stir to Combine: Use a wooden spoon or a rubber spatula to mix everything together. The dough will look shaggy, sticky, and very wet—this is exactly what you want. There should be no dry patches of flour left.
Cover and Wait: Cover the bowl tightly with plastic wrap or a clean, damp kitchen towel.
Phase 2: The Rise (Intensity: None – 12 to 18 hours)
Let Time Work: Leave the bowl on your kitchen counter at room temperature (away from drafts). This is where the magic happens. The long, slow fermentation develops deep, complex flavors.
If you used the ¼ tsp of yeast: Your dough will be ready in about 12-14 hours. It should be dotted with bubbles and have nearly doubled in size.
If you omitted the yeast: You’ll need the full 18 hours, or even a bit longer. Look for a very bubbly, loose, and expanded dough.
The Dough is Ready When… The surface is speckled with bubbles and the dough looks loose and web-like when you peek underneath. It should smell slightly sour and yeasty, like a good bakery.
Phase 3: The Shape & Bake (Intensity: Medium – 45 minutes total)
Preheat for Crispiness (30 minutes before baking): Place a heavy-bottomed pot (like a Dutch oven) with its lid, or a large oven-safe skillet and a separate metal baking pan, into your oven. Preheat the oven to 450°F (230°C). Getting the pan screaming hot is the key to a perfect crust.
Prepare Your Dough: Generously flour your work surface. Using a rubber spatula or your floured hands, gently scrape the very sticky dough out of the bowl onto the floured surface. It will deflate—that’s okay.
Shape Loosely: The goal is not to punch it down, but to gently shape it. With floured hands, fold the edges of the dough over onto itself a few times to form a rough ball. Don’t overwork it. The less you handle it, the more air pockets will remain.
The Second Rise (30 minutes):
Place a large piece of parchment paper on your work surface and generously dust it with flour.
Gently lift the shaped dough onto the parchment paper. Sprinkle the top with your extra seed mixture and press it in lightly.
Use the parchment paper as a sling to lift the dough and carefully lower it into your preheated pot (or onto your preheated skillet). If using a skillet, place it on the middle rack.
Bake with Steam:
If using a Dutch oven: Put the lid on and bake for 30 minutes. The lid traps the steam from the dough, creating a crisp crust.
If using a skillet: Right before you put the bread in, carefully pour a cup of hot water into the empty metal baking pan you placed on the lower rack. This creates a burst of steam.
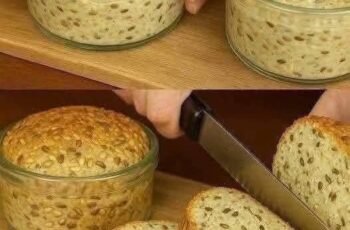
Finish Baking: After 30 minutes, carefully remove the lid (or the steam pan). The bread will be pale but set. Continue baking for another 10-15 minutes, uncovered, until the crust is a deep, golden brown and the loaf sounds hollow when you tap the bottom.
Cool Completely: This is the hardest step. Transfer the bread to a wire rack and let it cool for at least an hour before slicing. If you cut it while it’s hot, the inside will be gummy. Patience, young grasshopper.

