[ez-toc]
Simple No-Knead Artisan Yeast Bread
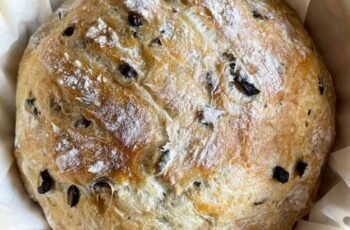
This simple no-knead artisan bread is crusty on the outside, soft and airy on the inside, and requires almost no hands-on work. There is no kneading and no special bread-making skills needed. Just mix the ingredients, let the dough rise, shape it, and bake.
Ingredients
- 3 cups (375 g) all-purpose flour
- 1 ½ teaspoons salt
- 1 teaspoon instant yeast
- 1 ½ cups (360 ml) warm water
- 1 teaspoon honey or sugar, optional
- 1 tablespoon olive oil, optional
Instructions
1. Mix the Dough
In a large mixing bowl, combine the flour, salt, and instant yeast.
Add the warm water and honey or sugar if using. Stir with a wooden spoon or spatula until everything is combined and a sticky, shaggy dough forms.
Do not knead the dough.
2. Let the Dough Rise
Cover the bowl tightly with plastic wrap or a clean kitchen towel.
Leave the dough at room temperature for 8 to 12 hours, preferably overnight. The dough should become puffy and almost double in size, with bubbles visible on the surface.
3. Shape the Bread
Lightly flour a clean work surface.
Transfer the dough onto the floured surface. Sprinkle a little flour over the top and gently shape the dough into a round loaf.
Avoid pressing the dough too much because you want to keep the air bubbles inside.
Place the shaped dough on a piece of parchment paper and cover it. Let it rest for another 30 to 45 minutes.
4. Preheat the Oven
Place a Dutch oven with its lid inside the oven.
Preheat the oven to 450°F (230°C) and allow the Dutch oven to heat for at least 30 minutes.
5. Bake the Bread
Carefully remove the hot Dutch oven.
Using the parchment paper, transfer the dough into the Dutch oven.
Optional: Use a sharp knife to make one or two shallow cuts across the top of the dough. This helps the bread expand while baking.
Cover with the lid and bake for 30 minutes.
Remove the lid and continue baking for another 10 to 15 minutes, or until the bread is deeply golden brown and crusty.
6. Cool Before Slicing
Carefully remove the bread from the Dutch oven and place it on a wire rack.
Allow it to cool for at least 30 to 60 minutes before slicing. This allows the inside to finish setting and gives you a better texture.
Helpful Tips
- Use warm, not hot, water. Very hot water can damage the yeast.
- Don’t add too much flour. The dough should be sticky and slightly wet.
- Give the dough enough time to rise. The long fermentation is what gives this bread its flavor and airy texture.
- Preheat the Dutch oven. A hot Dutch oven creates steam and helps produce a beautiful crispy crust.
- Let the bread cool completely before cutting if possible.
Storage
Store the cooled bread at room temperature in a paper bag or loosely wrapped in a clean kitchen towel for up to 2 days.
For longer storage, slice the bread and freeze it in an airtight freezer bag for up to 3 months.
Serving Ideas
Enjoy this artisan bread with:
- Butter and honey
- Olive oil and herbs
- Avocado and eggs
- Soup or stew
- Cheese and sliced vegetables
- Toasted with garlic and olive oil
- Sandwiches
Recipe Details
Prep Time: 10 minutes
Rise Time: 8–12 hours
Second Rise: 30–45 minutes
Bake Time: 40–45 minutes
Total Time: About 9–14 hours
Yield: 1 loaf
Difficulty: Easy