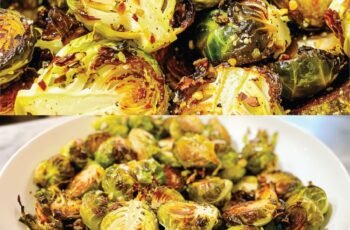
🥦 Air Fried Brussels Sprouts
Air Fried Brussels Sprouts are crispy on the outside, tender on the inside, and absolutely packed with flavor. Using an air fryer not only cuts down on cooking time but also reduces the amount of oil needed, making this dish both healthy and delicious. Whether you want a simple side dish or a snack to munch on, this recipe is a great choice. Let’s dive into everything you need to know to get perfectly air-fried Brussels sprouts every time.
✅ Ingredients
Here’s what you’ll need for this simple and tasty recipe:
- 1 pound (about 450g) of fresh Brussels sprouts
- 2 tablespoons olive oil
- ½ teaspoon salt
- ½ teaspoon black pepper
- ½ teaspoon garlic powder
- Optional: 1 tablespoon balsamic glaze or honey
- Optional add-ins: parmesan cheese, red pepper flakes, lemon juice, or crumbled bacon
🧼 Preparation
1. Clean and Trim the Brussels Sprouts
Start by washing the Brussels sprouts under cold water. Trim the hard stems at the bottom and remove any yellow or damaged outer leaves. For larger sprouts, cut them in half so they cook evenly. Smaller ones can be left whole.
2. Dry Thoroughly
To get crispy Brussels sprouts, it’s important that they’re dry. Pat them with a paper towel to remove excess moisture before seasoning.
🧂 Seasoning
In a large mixing bowl, toss the cleaned Brussels sprouts with olive oil, salt, pepper, and garlic powder. Make sure all the sprouts are evenly coated. If you like them spicy, feel free to add a pinch of chili flakes or smoked paprika.
🍳 Cooking Instructions
1. Preheat Your Air Fryer
Set your air fryer to 375°F (190°C) and let it preheat for 3–5 minutes. This helps the sprouts start crisping up right away.
2. Arrange in the Basket
Place the Brussels sprouts in the air fryer basket in a single layer. Do not overcrowd them, as this will prevent them from getting crispy. If you have a small air fryer, you might need to cook them in batches.
3. Air Fry
Cook the Brussels sprouts for 15–18 minutes, shaking the basket halfway through to ensure even cooking. The edges should become golden brown and crispy, while the inside remains tender.
Note: Cooking times may vary depending on the size of your sprouts and the brand of your air fryer.
🍽️ Serving Suggestions
Air-fried Brussels sprouts are incredibly versatile. Here are a few ways to serve and enjoy them:
- As a side dish: Pair them with grilled chicken, steak, or fish.
- As a snack: Serve with a dipping sauce like garlic aioli, spicy mayo, or tahini.
- With toppings: Drizzle with balsamic glaze or honey for a sweet touch. You can also sprinkle parmesan cheese or toasted nuts on top for extra crunch.
- In salads: Add cold air-fried sprouts to a grain or green salad for a hearty boost.
💡 Pro Tips
- For extra crispiness: Add 1 teaspoon of cornstarch to the seasoning mix. It helps soak up excess moisture and adds crunch.
- Avoid sogginess: Don’t overcrowd the basket, and make sure the sprouts are dry before cooking.
- Love caramelization? Let them cook an extra 2–3 minutes toward the end. The outer leaves will get deliciously crispy and slightly charred.
- Want more flavor? Toss the cooked sprouts in lemon juice, soy sauce, or sriracha after frying for a bold finish.
🔄 Variations
- Garlic Parmesan Brussels Sprouts: After cooking, toss the sprouts with grated parmesan cheese and minced fresh garlic.
- Asian-Style Brussels Sprouts: Use sesame oil instead of olive oil and add a splash of soy sauce and a sprinkle of sesame seeds.
- Sweet & Spicy: Drizzle cooked sprouts with hot honey or mix sriracha and maple syrup for a glaze.
🧊 Storage & Reheating
- Storage: Keep leftovers in an airtight container in the refrigerator for up to 3 days.
- Reheating: Reheat in the air fryer at 350°F (175°C) for 3–5 minutes to restore crispiness. Avoid microwaving, as it will make them soggy.
📝 Final Thoughts
Air Fried Brussels Sprouts are one of the easiest and healthiest recipes you can make with minimal ingredients. They’re quick, adaptable, and satisfyingly crispy. Once you try them, you’ll find yourself making them over and over again with different flavor twists.
Perfect for weeknight dinners, lunch prep, or guilt-free snacking—this dish deserves a spot in your regular cooking routine!

